Saturday, June 29, 2013

An Art Quilt Piece from my collection

Acid Attack 2006

I won this art quilt way back in 2006 during the second Quilt Swap featuring members of the Quiltart list.  I had it hanging in a hallway in our Sacramento house. We moved a year after the swap and it has been hanging in my studio ever since.  I am posting it now because it was made by Jan Johnson who is the leader of this month's challenge.  I wanted to thank her again for the wonderful gift and to let her know it is still on display in my home.

Sylvia

Thursday, June 27, 2013

Challenge #82: Masters of the Old Wild West

Theme: Masters of the Old Wild West
Technique: Abstraction
Hosts: Pam Clark, Jan Johnson
Due Date: July 6, 2013

Using the one of the Master Painters of the Old Wild West (Frederick Remington, Charles Russell or any other Old West Artist), select a painting to use as your inspiration, but create a quilt that would be an abstract of this painting. You could use Pablo Picasso's Cubism using cylinders, spheres, cones, triangles, cubes, etc. to depict your Western Painting in abstract style. Use at least one form of embellishment. Be sure to either show the painting you used for inspiration or tell us the title and artist of the painting you selected (providing a link would be fine).

Charles Russell paintings: http://www.charlesmarionrussell.org/

Frederick Remington paintings:

Background info on Pablo Picasso

Picasso's Cubism Period where he used cones, cylinders, spheres to depict the natural world.
Go about 2/3 of the way down the page to the black and whites of bulls and notice the progression from 3 dimensional to just lines made of shapes, but we can still tell that it's a bull.

Samples of Abstract Art Quilts

There are a great many abstract quilts on this page.

Here is a link showing Cubism art.

Here is a link explaining the concept of Cubism.

In this link below, Elizabeth Barton's "Edge of Light" uses abstract art to depict a town.
Here's an example of an art quilt by Barbara Strobel Lardon showing how she analyzes the tail of an owl and selects just
the right fabric.


And one final note: have fun with this!

Sunday, June 23, 2013

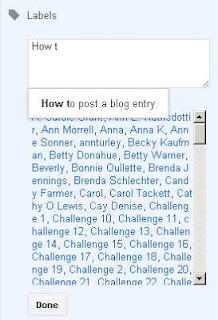
How to label a blog entry - revised!


When you have written your blog entry, add labels by clicking on Labels on the right.  A box will appear, with a crowded scroll box below it showing ALL of the labels that have ever been used.  As you type, the labels that contain what you are typing will appear below the entry box, and you can use the down arrow to select one of them or simply complete the typing.  Click "Done" to finish.

Two labels, and only two labels, should be added to your post.  One is the challenge number -- and it will be on the list, because it will have been used to post the challenge itself.  Enter that, then a comma, and then enter your name.  Because you have used the labels, you do not need to put either of them in the title of the post.

Saturday, June 22, 2013

O is for found Objects, or Oh, look what I found!


All the discussion about FFFC has kick-started me to finish this piece, which measures 13" x 10".  Found Objects, including washers, a ring, and oval earrings, were encased under a damask napkin by hand stitching around them.  This was bordered by hand-dyed cotton fabric.

Thank you all for the great discussion.  I think it gave us all that needed push to get things done.

Friday, June 21, 2013

V is for Viktoria

V is for Viktoria
Close up of embroidery


Bits of trim and Jewelry


Since someone else posted a previously completed Alphabet quilt, I will share mine.  A couple of years ago my guild did an Alphabet Soup challenge.  Each artist was given their letter in fabric and had to use it on the front of the quilt.  Quilts were to be 18"x 24".  Each artist got to select their letter from list of remaining letters.  By the time I got to select there were only a few vowels and V left,   I chose V.  

My daughter was named after my grandmother.  I used the German spelling of Viktoria.   My grandmother did wonderful embroidery work.  I have several pieces of her work.  My daughter does lovely cross stitch.  I  immediately had an idea for this piece, I tried to make it look like Victorian crazy patch.  The floral embroidered motifs came from a maternity smock that I had made and worn when expecting my daughter.  For some reason my mother had cut of the motifs and saved them.  I had done the little house cross stitch many years ago and never framed it.  The buttons are vintage and come from my late mother's button box.  As well as the brooches. The lacy trim came from my daughter.  She had pulled all the filly decorations off a lampshade and gave me a box filled with bits of this and that.  I tea dyed the letter V's, they were on a white background.  It was a very satisfying piece to make.

The collection was hung in that year's quilt show.  It also was on display at the HMQS quilt show, and at the Springville art museum's annual quilt show. I can't quite remember what year it was made.  I am not where I can look at the label today.


Thursday, June 20, 2013

Q is for Quilt


All this lively discussion in the past week encouraged me to  post this piece which fits the current challenge, although it was made for a different challenge group.  "Q is for Quilt"  and a few other things.  The small yellow quilt hanging off the bottom is a six inch nine patch quilt with 1/4 inch squares.   Other items beginning with Q were added using ATP- a first for me.  The quilting includes cursive lower case q's, too.

Peggi Yacovissi, Wellsboro PA

Tuesday, June 04, 2013

Road Trip!

"R" is For Road Trip!
This is a collage of several small postcard-style quilts that show a road trip through the Southwest. The background is a city skyline while the border represents the wide open road. Text includes not only the free-form cut letters, but  also the background map behind the two figures. My quilt measures 22" x 21".

Monday, June 03, 2013

Pouring T

21" x 17"

I seldom include letters or words in my pieces, but the challenge called for them, hence, Pouring T, quite literally!  I tried cutting the letters out from fabric, but since I was unwilling to sew all around the edges for each letter, I tried out a technique that came through Joggles.com recently.  They had a video of printing using adhesive foam and pieces of foam core for printing, and since I always have loads of foam core scraps, I gave it a try.  The printing came out a bit light, but I filled in the T's with the same marker I had used for ink, and outlined the H2O steam and felt satisfied with the result.

At first, I was going to crop the kettle, but it wanted to be included in its entirety -- though it didn't want to have a handle!

Thanks, Ann, for a fun challenge.  I welcome any comments.