Saturday, July 31, 2010

Ch47 Evening Walk Solitude

As usual I am late. I am posting my piece, it is not stitched yet. Will post again when I get the stitching done. I really haven't used any new techniques, well I painted the background fabric so I guess that is sort of new for me. I am in bad need of some 'solitude' so after doing the trees it reminded me of such a quiet peaceful scene that I put the gal in, she looks very much like my niece. Odd how that happens when drawing faces. Enjoy.
The trees are more fantasy than anything. Thanks for the challenge Tobi. Now onto the stitching.

I have finished the stitching and the binding. Changed the birds out, there are three ravens can you see them.
Did a bit of hand stitching and am pleased to have this challenge completed, it's been awhile :) The color is more true in this photo too. Thanks for having a look.

Tree


I was a little late getting started on this one and a little late finishing. It was really fun to do as I tried a technique I have been wanting to try for a long time. The image was created by using dyes on cotton prepared with soy wax resist. I was pleasantly surprised at how much easier it was to work with the soy instead of paraffin and very happy with the lack of odor from melting the wax. It was also much easier to remove. On the other hand, I found the dyes seeped under in a few places. I may have to apply two coats to make sure I have total coverage in the future.
The piece is about the negative effects some of our human actions have on trees. The holes signify loss of trees and the writing around the outside says such things as "over population", "climate change", etc. It measures 15" x 15".

Girl on a Swing


28" x 18 ½""

10/1/2010 -- Third prize winner at an Art Show!

9/10/2010 --
I finally put the finishing touches on this piece, and it has just been delivered to its first art show today! She now has a face, eyes and a mouth made of beads. The final shape is only slightly irregular, and now I wish I had either kept it straight or made it more irregular so it wouldn't look just a bit off from straight.
---------------
There is finishing work to be done, but this is far enough along that I decided to post it. The top portion will be a hanging sleeve, to go along with the swing.

The girl is actually a 3-dimensional doll made with a wire mesh framework, on a swing with chains attached to the tree branch. She still needs hands, and, maybe, a face. The tree is thread-painted, actually using the drawing technique I mentioned in the challenge, which I've never done in thread, using a twin needle (another first for me) on top of brown fabric. The leaves are organza in three shades, held on with beads. The fringe used (and used up!) seven hanks of embroidery thread.

Aside from the advance time I have to think about a challenge that I host, I try not to jump into making it until it is officially posted. I'd appreciate any comments -- and does it need a face?

Trees Are


I read the challenge while visiting our son in Seattle and thoughts of giant Douglas firs and nurse logs came to mind immediately. Then on the plane ride home, I decided to do something less literal and more funky-definitely outside my style. I mused on what trees meant and came up with four statements which I thought I could machine quilt to the borders-again not a new technique for me, but not common either. Looking through my hand-dyed fabrics, I came upon a purchased light yellow green fat quarter-definitely not my usual color scheme. Using all solids is not new but not something I usually do either. I was going to machine couch the variegated pearl cotton but that flattened it so I hand stitched it using a stem stitch. So this quilt came together very quickly and easily and even photographed well on one try early this morning in time to make the deadline. I didn't do anything new technically to me but did try to use less familiar techniques and colors. Very enjoyable and a good memory of a good vacation.

Friday, July 30, 2010

Un Named at present

Wow! What a challenge this was Tobi!! And so much fun, too.... I really went out of my 'zone' on this one, got right out there on that limb! Almost everything in this has some new twist or take to what I would normally do. The quilting, for starters, I did the tree first and used a quilting design I have never tried before and have to say I like it. Then the background is something I have never done before... added some color and stylized the leaf design in the fabric. The woodpecker looks a little odd.. like a mole or some little animal as opposed to a bird... oh well...  and my bunny is paper.
I have a different edge shape than I have ever done... notches out of each side, one upper, one lower.... I will face it, then it is finished.
So, now I am looking forward to the critiquing process... its strengths? its weaknesses? Colors?
Or overall... is it OK? And I appreciate a 'good going', too.... means you like it...
 Size: size: 17 x 32

Thursday, July 29, 2010

Joshua Tree Sunset


Joshua Tree Sunset.It measures 19"X22 1/2".

I used 6 different sheers,3 different satins, and asparkle tulle to create the sky. Black suede cloth for the silhouette.

New to me was doing the silhouette in one continuous appliqué. As for leastfavorite color...I must cop out, as I just LOVE color and can't think of a single one that I don't.

Thanks Tobi for a fun challenge.Comments are welcome and very appreciated :-)

Cherie

Wednesday, July 28, 2010

Reflection


The tree is from a picture in Flickr without the leaves. (used with permission) I just liked the shape of the tree. The tree was thread painted and then appliqued on.


The tree reflection was colored in with a crayon.


The bushes and reflection were machine appliqued with invisible thread.


The quilting was also done with invisible thread.


The color that I didn't like was used as the border and binding.
I also added the picture of the tree that I used as a guide.

Tuesday, July 27, 2010

Three Forest

I love trees and drew a picture very similar to the one I drew and used for this several years ago. I tried several new methods in this project. First I've always wanted to but never did know how to screen print. I bought myself a small kit a couple of weeks ago and used it on these trees. I made the design and then inked it onto 3 different fabrics. I then cut out the trees and fused them to the background. I used several old pieces of fused fabric scraps and cut grass from them. Another new try was an uneven edge top and bottom but instead of mitered corners I tried square corners. This I had difficulty with so probably won't use it again. Then of course the beads as faux leaves on the trees. I'm not much of a beader but opted to use them for this small forest of trees, thus the name 'Three Forest'.

Tree of Imagination


I created this tree for another challenge but think it fits perfectly for this one.

It is a tree Alice might have seen as she journeyed through the rabbit hole.

I dyed and quilted the background, then created the tree in sections fusing and stitching the fabric onto Timtex (to make the pieces self supporting). I then used expanda paint, heated and distorted, and painted for texture. the tree limbs extend off the top and sides of the quilt. The tree measures 50"x24".

The leaves are shapes from many different trees, created by fusing 2 different fabrics (front and back) to both sides of aluminium then cut out and attached by stitching stems to the tree using a single bead on the front through to a bead on the back of the quilt for stability. Many of the leaves have synonyms for imagination written on them (fantasy, insight, creativity,ingenuity, idea etc.).

This little haiku is written on one leaf:
Brilliant Autumn Skies

Fractured Multicolored Leaves

The Mind's Butterflies

I love making trees and have made many different techniques and intend to create a new one for this challenge, although it will most likely be late. I am working under a deadline for another challenge and can't be late on it.This quilt measures 48"x22"


Comments very welcome and appreciated :-)

Cherie

Monday, July 26, 2010

Magritte and Me

Magritte and Me
17x23" (challenge #46)
by Laura West Kong

I've been experimenting with fusible "brush strokes" of fabric to "paint" a picture with fabric instead of paint. This is my second attempt at this technique.

I scheduled this quilt to take a week, but due to a shortage of Lite Steam a Seam 2 in my personal quilt stop, aka stash, it took about a month. I have got to have a talk with that store manager about inventory shortages. ... Oh yeah, that manager would be me. ;-)

Here's a detail of the castle. I don't think I could live up on a floating rock like that if such a place existed, but it would make a fabulous location for a studio, surrounded by the sky and the sea, and no place else to go.

I've always loved Rene Magritte's painting, The Castle of the Pyrenees. In fact I liked it so much I did a reproduction of it in a painting class, and I used my painting as the reference for this quilt. You can see my painting and find out more about this quilt at my blog.

Friday, July 23, 2010

Ch 47 - Trees

I had to do this one fast, so my tree is kind of thin. I will likely add more branches later. My kids and grandkids will be here this weekend and are staying for the week, so this 12 1/2" x 12 1/2" block is all I can get done before the onslaught. It is not yet quilted.

We live in windy Wyoming, so our trees are often leaning as shown.

silk tree


I made this a while ago from silk fusion dried over the very fissured bark of a pine log. Woollen yarns fixed by embellisher machine and by hand, silk sari yarn hand couched, hand stitched and beaded. I am not one for handwork, but this was fun to do, and is one of my favourites. I've always meant to do another one, so maybe this will spur me on. About 14 inches by 4.

Thursday, July 22, 2010

Barking Up the (Wrong) Tree


This is my entry for Tobi's challenge. I made it a while back using real tree bark, tyvex (painted and heated) yarn and real moss stuff(?). All the embellishments are hand stitched to a heavy feed sack (lost the name) and then to a corduroy background and then sewn to another background and mounted onto foam core. I did use my embellisher machine to place the yarns down. My husband drilled tiny holes in the bark so I could sew it down.


Amazing for me to hand stitch anything. I really like this challenge and may do another because I LOVE trees also.


Thanks, Tobi, for a great challenge.


Sea Ranch Carol

Wednesday, July 21, 2010

Challenge 47 - Out on a Limb

Out on a Limb

FFFC #47 for July 2010 (due July 31st)

Host: Tobi Hoffman

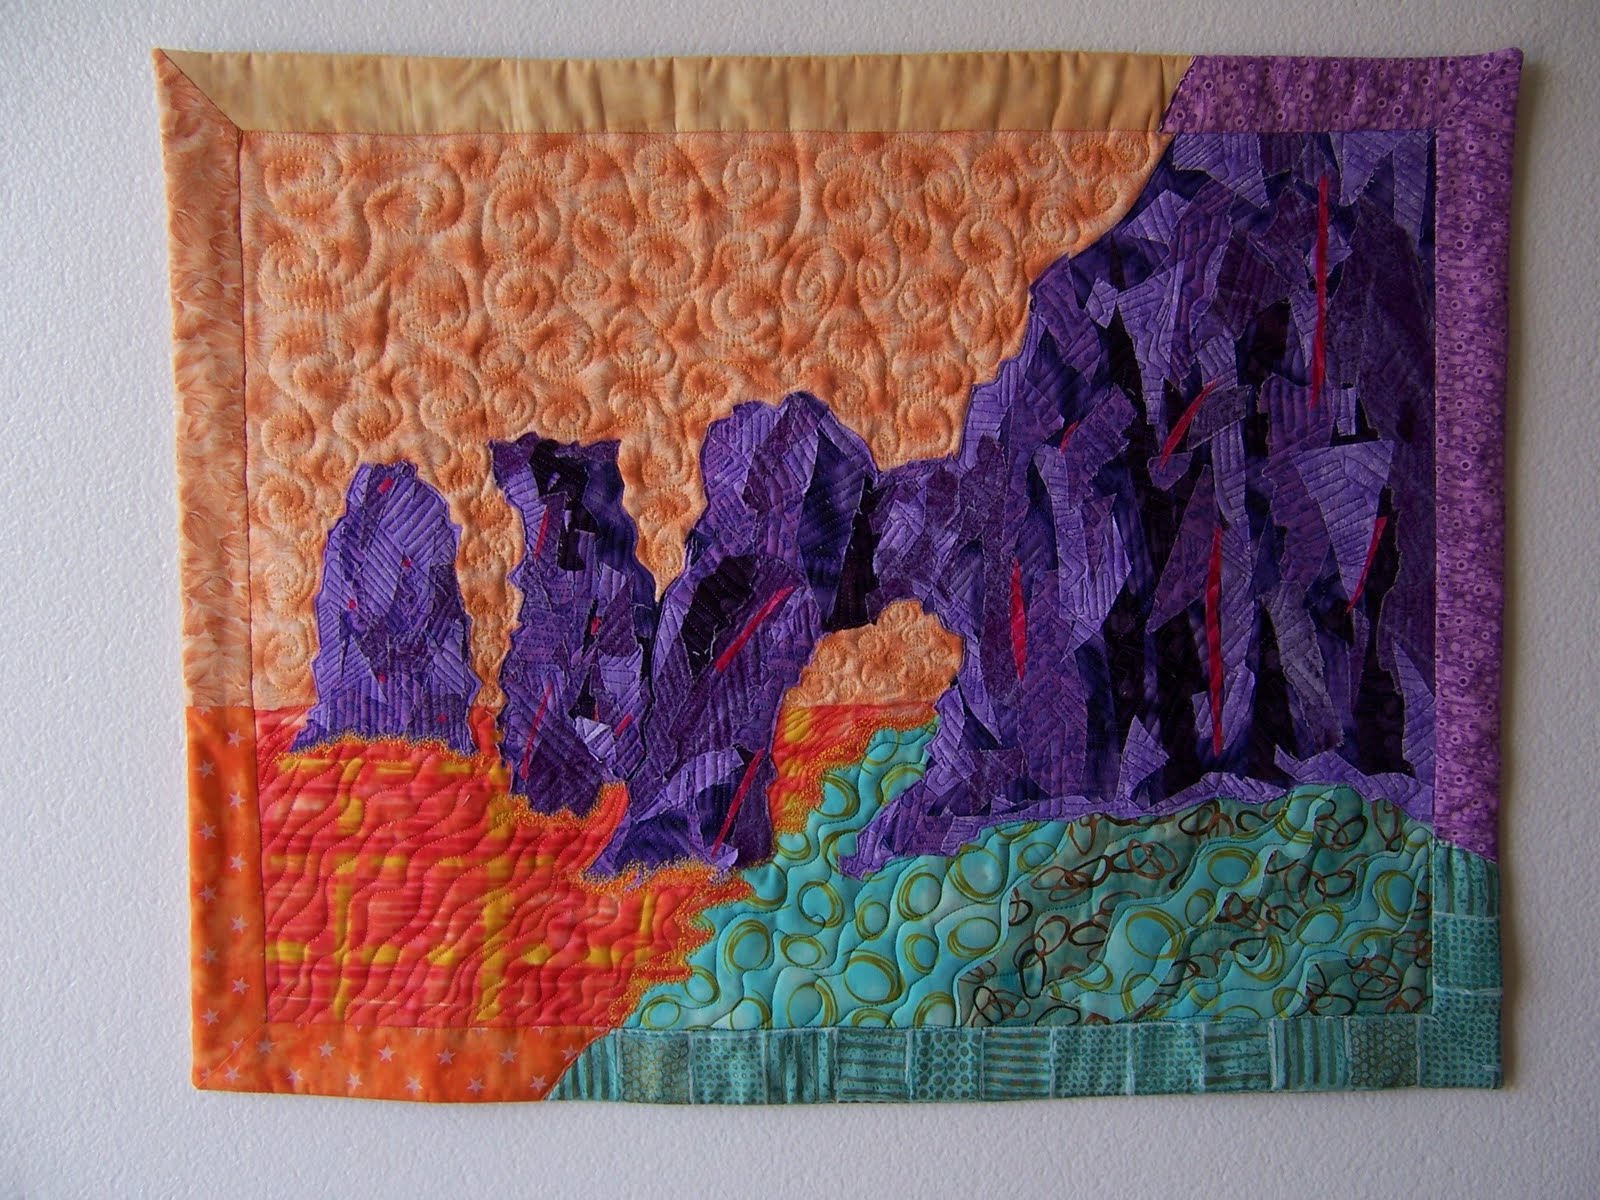
Back when I was in third or fourth grade, my parents enrolled me in a Saturday art course at Morton Arboretum in Lisle, IL. The one thing I remember most from that class was a method for drawing a tree: draw a line from the root, up the trunk, along branches until you end up at a twig, and continue doing this until you have filled up the entire tree with twigs. The trunk and branches grow a bit every time you draw those lines to put in another twig. I may not be able to draw a face recognizable as its subject, but I can still draw a tree! While this method is not as applicable to quilt art unless you are doing thread-painting, it introduces the theme of today’s challenge - the theme is trees, whether a seedling, or a seed, a twig, branch, a single tree, a grouping, or a forest – but look at it from a new angle.

Technique: Go out on a limb to try a technique that is new to you to create your tree. Take a point of view that is different from your usual one, bird’s eye, caterpillar’s eye, a pilot’s view, or a worm’s. Try a new way to embellish your piece, or incorporate some element you have never tried before. Use your least favorite color, and make it look good. Pull out crayons, beads, yarn, Angelina fiber, all of the above or none, but don’t forget one thing – have fun!

Links:

http://pcoxdesign.blogspot.com/ 2/7/10, 3/6/10 posts, Patty VanHuis- Cox

http://www.davidtaylorquilts.com/gallery.html

http://www.wellingtonarts.ca/wcm/documents/wcm/Threadwork2010CAT.pdf

(A whole show of tree art!)

From past FFFC’s:

http://fastfridayquilts.blogspot.com/2007/07/monets-lesterel-mountains.html Betty Donahue

http://fastfridayquilts.blogspot.com/2007/11/moonlit-swamp.html Delta (Rhonda Blasingame)

http://fastfridayquilts.blogspot.com/2008/09/mossy-delight.html Lisa Albanese

http://www.tobicollage.com/collages-nature/last-leaf.htm Tobi Hoffman (improved from blog)

http://fastfridayquilts.blogspot.com/2008/12/freedom.html Lisa Albanese

http://fastfridayquilts.blogspot.com/2009/04/untitled-challenge-31.html Susan Brittingham

The tree as artist: http://www.timknowles.co.uk/Work/TreeDrawings/tabid/265/Default.aspx

Not quilted, but interesting, by Nina Kuriloff: http://www.flickr.com/photos/ninaartist/4646743842/in/photostream/

The baobab trees from “The Little Prince”: http://media.tumblr.com/tumblr_kv7oz3O3sV1qzd8ie.gif

An interesting blog on trees in art by Maureen Shaughnessy: http://ravengrrl.blogspot.com/2007/09/trees-in-art.html

Monday, July 19, 2010

The Big One


I thought long and hard about this challenge and mostly the challenge was to eliminate the many idease that ran through my mind. When the challenge came out, I was visiting Samoa and Wellington, New Zealand.


After getting home, I battled the jet lag, bad airplane germs and general spaciness. I wanted to get something done before the next challenge appeared.


Since I live right on the San Andreas Fault in northern California, AND had a 2.8 earthquake on Sunday morning while I was marveling at our recently returned sunshine, I thought that this was appropriate.


Carol

Sea Ranch, California

Sunday, July 11, 2010

Sea Dragon arrives !


Here is my Sea Dragon. I really enjoyed this challenge. Though clearly, I have not learned how to create a quilt in a week, much less a month...but I am still trying...LOL. Maybe I need to think of the challenges as "exercises" instead of a call to create another wall quilt...
This quilt has hand beading and netting in addition to the batik and cotton fabrics.

Tuesday, July 06, 2010

Devils


This is an airplane view of the Devils Tower in Wyoming.
The landscape was made with a dress fabric and upholstery fabric. It didn't take long to cut pieces which I held in place with washable fabric glue until I raw edge quilted it to the background which is a Carol Bryer Fallert fabric.

Monday, July 05, 2010

Challenge 46, Pam Clark

I finally was able to do a direct post after jpd explained where to find the simple directions. Thanks for your help in unravelling this mystery for me. This is the picture of the quilt, which I was able to upload to the photo gallery earlier. Last year I took a class with Scott Murkins, who was also our quilt show judge. His specialty is strata quilts. I had made several blocks in that class, but couldn't decide how to put them together. When this Challenge came out, I thought by combining four blocks, I could abstractly simulate a geode. Since most geode's centers are light, I made this one dark. I know this is a little bit of a stretch of the imagination, but I love the colors in this little quilt that measures about 16" x 16".
When my sister, Nancy, and I were younger, we had to walk 1/4 mile to our mail box everyday in the summer. We loved to pick up rocks, take them home, and crack them open to see what they looked like inside. We were always astounded at how beautiful they were. We'd find an ugly old gray rock and when we cracked it open with a hammer, there was no telling what we might find. Our favorites were the ones that had flecks of blue in them, which were quite rare, but very beautiful. When we found some that had gold or silver flecks in them, we always wondered if it was "real gold". Of course, it was probably iron pyrite or something, but we always had high hopes that we had found the mother lode. This quilt is symbolic of the flecks and veins that we used to find in rocks. We visited a rock shop where the owner cracked open the rocks and then polished them and they were spectacular.
In this quilt I used metallic threads to quilt it to add those silver and gold flecks. It doesn't show up well in the photo, but I hope you get the idea


Ch 45 - Geology

This has been a busy spring and I haven't had the time to participate the past couple of months. We bought the property next door which has a small building that will be used as a quilt studio and guest house. While moving sewing items over there yesterday, I came across Bargello-Bears which I made a couple of years ago, and I realized this is the geology strata that is this month's challenge.
I apologize for using an older quilt, but I so wanted to take part in this month's challenge.
After making the strata, I wasn't happy with the quilt, so I started adding applique items, until I was happy with the result. I think it is more interesting with the bears, fish, and trees added.

Sunday, July 04, 2010

Fossils of a Different Color

Above is my challenge piece, a day late, which is better then I have been doing so I am not going apologize (too much ). I almost had it done on time but had problems with a quilting thread yesterday that I had to take time to unsew, then to make a decision about what to use instead and... you get the picture. I used reference photos of fossils found in stones to draw this large shell fossil. Actually it isn't that large the whole quilt is about 10 inches square. I carved 2 stamps and used Jacquard fabric paints to stamp the background. The large fossil has been machine appliqued down to the sandwich top, and I didn't do any additional quilting on it, just the satin stitch. I am thinking about adding some beads but not sure where or what color so for the moment I am letting it go as is. I have some in process photos and a bit more description of the making process for this quilt on my blog if your interested. Comments welcome.

Kathy Walker
http://katwalkdesigns.blogspot.com/

Friday, July 02, 2010

Standing Stones at the Summer Solstice


Finally got one in on time. This is a quick one hour project that used my embellisher for the base of the standing stones and some of my hand dyed backgrounds. Strange colors prevail. I threw caution to the wind and chose fleeces at random that went against my better judgement then placed them on the background that I wouldn't normally have chosen. Seeing the finished photo makes me think it might try working this way again. Thank you for the challenge and the stretch!

This was a piece that spoke to me after spending all last summer with Diana Gambalden's Outlander series following Claire Beecham Randal Fraiser and her escapes through the Standing Stones near Inverness in Scotland. If you haven't read it, do it. I am re-reading this summer.

"Bearing Gifts" - A Childs view of Rocks


One of the challenges for me as I approach our Fast Friday Fabric Challenge is to get real about what I can do in a week, satisfy the requirements of the challenge, and satisfy my desire to push myself to create something new, quickly. This was created from a photo of a child's hand holding beautiful stones to bring to mother. The rocks, of course, were really grey and brown with some flecks of other colors. Both the child and mother find them to be truly beautiful. The arm and hand were traced from the photo to a piece of white paper, then transferred to the fabric using Faber Castell Pitt Pens which are India Ink. They dry quickly and are permanent. I held the pen straight up to mark the dots which create the shading. Being the impatient person I am, after a few minutes I chose to use a bolder pen tip than what I started with. Although I am pleased with the results, they would have been finer if I had used the finer pen tip throughout. The rocks were free motion embroidered using three different variegated threads. The contrast between the threads and the fabric is a bit more subtle than I would have liked. The stipple quilting was an opportunity to practice something that I don't use very often.


I enjoyed creating this work - from taking the photo, converting to a sketch, tracing the important lines, tranferring to fabric, free motion embroidering, and stipple quilting. Thanks so much for creating this challenge Kathy. It was great fun.
Any comments or criticism are very welcome.

Geo-dino


This was a fun exercise for me. I started by looking at rock formations on the internet to get a feel for what real geo-formations are like. Then I went into my stash to find some “rock” fabric. Found this great red/orange commercial fabric that just said “stones” to me. Using a sakura graphics pen I let the fabric guide me to create fissures in the rock. I quilted with black thread along my black lines and then used a combination of throwing in a few Zentangle patterns in purple thread as well as playing with a little water color pencil to make the yellow highlights. The piece has been trimmed to 8x10 so as to fit into a standard black frame. My husband surprised me when he said he saw a dinosaur peeking out of the rock. Well Yah…it’s there to my amazement. I was thinking the agate slice would be the focus point, but I think the dinosaur has up staged it. It’s good to be back in the studio doing fast Friday quilts again. Thanks Kathy for a terrific challenge! Comments and critiques are appreciated.

El Arco


El Arco is my contribution to this wonderful challenge. The geological formation is the predominant landmark at the tip of Baja California, Cabo San Lucas, and is often referred to as The End of the World. Finished size is 25"x19". Techniques used were mainly a form of confetti fusing as well as some thread painting. The edge finish is a 2" facing, and for a change, was successful. This is a favorite vacation stop for us as we have been there several times.

Thursday, July 01, 2010

Please Don't Take Me For GRANITE


This is my take on a Tafoni Granite weathering structure in Idaho.


I used only my handyed fabrics, and satin sitched every piece onto the batting. I intend to do a lot of quilting after facing the edges, and backing, using the pillow case method.
I will have to wait a while to do it though, as my therapist told me I was 'pushing it' too hard too soon :-(
I would love critiques and suggestions for quilting...Should I quilt the rocks (they are already quilted in outline with the black). I will definitely quilt the sand and sky.
It measures 22"x291/2".
This was really challenge and a stretch for me Kathy...LOL I tend to work most of the time as close to the real colors as I can get. It was so much fun once I abandoned myself to playing with colors. Thank you Kathy!
Cherie
Here is the quilted and finished piece! What do you think, does it make a difference?


Sikanni Canyon

Wow, my first challenge for sometime and I actually finished on time. I chose a picture of one of our favorite places for this challenge. The rock formation in the canyon of the Sikanni River have always fascinated me. Some rocks sideways others up and down and the prestine crystal clear water of the north. I have also included the original photograph to give you an idea of the true color of the landscape here, nothing like Utah, or Fire Valley NV, yet those are the colors I chose.
I painted a piece of fabric and then added a lot of stitching, both machine and hand stitching. I look forward to your critique. Thank you for the great challenge Kathy.

Max Patch


Here is a little 9 x 12 silk quilt that I finished just before this challenge was issued.

(I have also added the altered photo of the actual spot in the mountains)


It is based on an altered photo of "Max Patch", a beautiful spot on the Appalachian Trail where you have a 360-degree view of all the splendor around.
It is all Dupioni silk, with lots of thread painting, and of course,
a few beads...

Marilyn Foulke
Louisville, KY